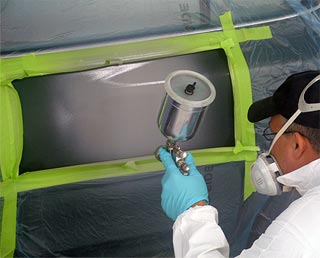
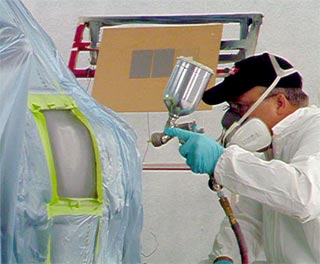
 The most popular UV cure paint products to date, are primer-surfacers. They may be supplied in aerosol cans, or conventional bulk containers for spray gun application. Some brands of UV cure primer-surfacers are formulated using non-hiding pigments that allow the coating to be translucent at the recommended film builds, while others are opaque. The translucent primer-surfacers allow the UV light to penetrate the entire thickness of the film allow thorough cure, while the opaque primers do not require the product to be translucent to achieve cure. Because there are differences between UV paint products and paint chemistries, always follow paint manufacturer’s recommendations for product application techniques and film thickness builds to ensure optimum product performance.
UV Primer-Surfacer Uses
Most of the UV primers that are offered are versatile in application. It is important to review the manufacturer’s technical data sheets for specific recommendations on surface preparation, application, and curing. It is especially important to reference the paint manufacturer’s recommendations in regard to whether an adhesion promoter or plastic primer is needed over certain plastic parts.Most of the UV primers that are offered are versatile in application. It is important to review the manufacturer’s technical data sheets for specific recommendations on surface preparation, application, and curing. It is especially important to reference the paint manufacturer’s recommendations in regard to whether an adhesion promoter or plastic primer is needed over certain plastic parts.
UV Primer-Surfacer Application
When applying UV cure primer-surfacer using a conventional spray gun, apply one to two coats allowing one to two minutes flash time between coats. Most UV cure products are ready for use, with no pot life. However, when using product in bulk containers, it is important keep containers closed and keep light exposure to a minimum because natural and workplace lighting can start the curing reaction of UV cure products.
Watch a video on spraying the primer (1.5 Mb).
When applying UV cure primer-surfacer using an aerosol, apply four to five continuous, even coats to the repair area. More coats of product are recommended when using an aerosol can because aerosols generally deliver less product per coat when compared to conventional application methods using spray equipment. Unlike using the conventional spray method, no flash time is required between coats when using an aerosol.
Film thickness should be between one and six mils before sanding. Always follow paint manufacturers' recommendations. UV cure primer-surfacer is compatible with most sealers and topcoats. Regardless of the application method and packaging used, once cured, the UV cure primer-surfacer film is tough, even against many paint solvents.
Most products are ready for use, with no pot life. However, containers must be kept closed because natural light and work place lighting can start the curing reaction of the paint.
UV Primer-Surfacer Curing
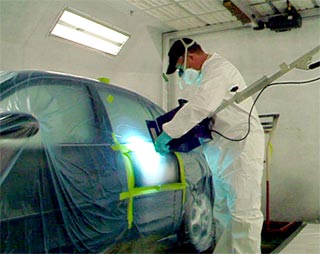
After applying the primer-surfacer to the recommended film build, allow two to five minutes of flash time before beginning curing. Solvent flash time is important. If the solvent flash time is insufficient, solvent will remain trapped in the film when the very fast UV cure takes place, and problems will result. Insufficient flash times can cause dieback, solvent popping, and adhesion failure. After the paint has flashed, an approved UV lamp should be placed eight to ten inches from the panel surface. The repair area must be fully illuminated for a minimum of two minutes. If the lamp-to-panel distance is increased, cure time will be significantly extended.
Watch a video on curing primer-surfacer (1 Mb).
UV Primer-Surfacer Prep For Basecoat
After curing, some UV primer-surfacers may be slightly tacky on the surface. The tacky film can be removed using a cleaner that is formulated for that purpose. Be sure to use wiping cloths that are free from contamination. After surface cleaning, the primer-surfacer can be wet or dry sanded using the recommended grade of sandpaper.
After sanding is completed, clean the repair area using the solvent recommended by the paint manufacturer.
Watch a video on sanding primer (2.3 Mb).
